Don't walk behind me; I may not lead. Don't walk in front of me; I may not follow. Just walk beside me and be my friend.


Gratitude unlocks the fullness of life. It turns what we have into enough, and more.

Wednesday, November 23, 2011

Machine Cover ....


Thought I just show you my sewing machine cover that I had machine quilted a very long time ago. Confession time Rina never ever finished it and had been using it just like that, well it did do the job oopps. Even worse this cover was never made for this machine (Jenome) but for a Singer, which turned out to be the biggest lemon, maybe that's why it never got finished. Good excuse Lol

Well this is one of "the unfinished bussiness" I needed to take care of and now I can present you with the cover. I did not remake the whole cover but simply removed a few things like ribbons and frills that had seen better days, if I had red piping I would have taken the whole thing apart and replaced the pale yellow but I had none, a little wasteful cause there was nothing wrong with it. Added a little strip of colour to the pocket and new lace, added a colourful bow and a new border at the bottom. TaDa and she's all ready to go again

The pocket is handy to place your pedal and codes in.


Having a spot open for the handle, makes carrying the machine to sewing classes so easy. Well I be back soon got a few more items I am working on that I would love to share with you
See ya
Rina

Tuesday, November 22, 2011

Aprons making ...


Well I just want to share one of my silly passions with you all, it a bit old fashioned but it comes all the way down from my Grandmother days. She wore an apron just about everyday of her life. One of the first thing she'd put on in the morning, then do her work for the day. A clean apron everyday so she must have had quite a few of them.


Lately I been thinking I might want to make a few and stop getting my cloths all mucked up with a oil stain here and there. sometimes not even grabbing a hand full of flour soaks it up and then you left with a stain, not a nice look! I bought and sewed up these two pannels years go and have them hanging as part of the decor depending what season it is. But it's this one I finished off last night, that I really wanted to share with you. It still needs some embellishment to the bottom, just going to sit and look at it for a while first, it will come to me. Any ideas would be very welcome. Where is that going to go ... well the outdoor kitchen when ever that gets built, that's where all the old wares are going to be displayed on shelves oneday.


Drop me a line if you'd like the pattern ...
It's raining cats and dogs in Sydney today expecting more rain this week too, nice weather for sewing. Have a great week everyone.
well thats it for today
Rina

Saturday, November 19, 2011

Ticking My Favorite Material ...


One of my favorite materials is ticking, tough as old boots, but still easy to sew. I love it so much that I have made cushion covers from it for the comfy cane lounge chairs for the pouch The local upholster will be making the fitted bottom cushions, a little bit tricky to get them sitting tight. I tried before and mucked it up good, now it's just easier getting someone else to do them.

The top covers was easy, just had to unpick the old ones, pin and cut to size, make ties, placing them in the right spots, zip around on the sewing machine leaving space for the zip, pin and sew zipper in turn inside out. What I have done is make another inner cushion with the stuffing in it and sewed it closed. Placing it inside the ticking cover. With a uphostery needle sew buttons on spacing them to look pretty and stop the cushion from "exploding". Using string you could also thread it through and tie knots. For washing purposes it is heaps easier having the cover removable and just reknotting or buttoning it again.

Another quick machine quilt project in red ticking, to fit in a side table/serving trolley without wheels, George made it for me, a special request kind of thing you know. It's great for displaying stuff.

You can buy ticking in a few different colours, I like the green striped one the best. Used with a matching bais binding to finish the sewing project off. A real classic look still use in decorating. This material reminds me of my boarding school days our mattresses had ticking covers, even then I loved them, stacked on steel framed beds waiting for you to put your own bedding on. A reminder of happy boarding school days.

Monday, November 14, 2011

Making a dent in the UFO's ...


Who loves doing sewing repairs, much easier to start a new project, but when you do someone's washing and the tote bag falls apart and all you can savage is the lining. And here I am thinking yes I could just go buy a new bag to replace that one. No maybe I just sew one up, sure going to last longer than the bought one. So I unpicked the lining and cut the pattern from that, it's was a real nice bag too.

I am already thinking I make one for myself from that pattern too. Out comes the offcut of a black curtain with thermal white rubbery stuff. (still got enough material to cut another bag)sewed the lining back up, sewed the outside up too, placed the lining inside the bag, pinned them together and zig zaged the two together.Found matching material and cut a narrow strip long enough to wrap around the top,pinned the strip and bag rightside together, fold the strip back on it self about 3cms, pin all the way around, overlapping the last bit. Stitch down the strip.
Fold the strip over the top and pin it & sew.

Cut 2 x 12 cm wide x 50cm long strips, fold rightsides together and sew one end and along the pinned side. Turn it inside out, tuck the other side in and sew closed. Position handles to suit and sew them on. I crochet a flower and sewed a large safety pin to the back of the flower, it matches the lining.

Anyone needing the pattern just drop me a line with you addy to rinaspostbox@live.com.au and it's in the post for you asap
Well I am please with it and sure hope the daughter inlaw will be too.

see ya
Rina

Friday, November 11, 2011

Plants for Rose Cottage ...


3 new rose bushes, the buds are just bigger than a miniture rose, stong perfume too. No tag so can't tell you they name.


This little geranuim has the smallest leaves and flowers I have ever seen. At the nursery, there was a hanging basket with this cutie just spilling over the edges of the basket, well I had to have one too.

Also bought 2 small Yesterday, Today and Tomorrow shrubs, and a few asparagus crowns. A Bob Hope Camillia Japonica, tag says "Brilliant deep red, large semi double blooms with wavy petals" sounds good enough for me:)) Need all the colour we can get. We might just pop into the nursery today, maybe there is just a little something else that tickles me fancy again. Hopefully we'll head to the farm next weekend

Until nexttime
Rina

Wednesday, October 19, 2011

What's on the hook ATM ...


Dress your little one up in this cute little outfit!
Designed by
Valerie Moffitt


Well maybe not exactly like the above little dress. Still got the sleeves and another 2 rows on the lenght of the dress to go, add a little green edging and it should be done. Then just a little head band to match

Cute don't you think
Rina

Monday, October 3, 2011

Little spring vests ...


Oh these little knits are so cute and here's a link to the blog I found them on

You can purchase the pattern on this link

Aren't these just so adorable
Got to pass this pattern on
Rina

Wednesday, September 28, 2011

Halloween ...


A family of pumpkins waiting to dry 24 hrs and then painted orange

There's Halloween decorations everywhere you look ATM, at most discount store it's just the same old stuff. Why can't we make our own I thought or at least some of them.This is what we started on Clay pumpkins which we will be painting orange. Oh I wish we could get a few real pumpkins to carve only they so expensive here.


Here these 3 kids hav just finished rolling and shaping the clay, it's got to air dry before we can paint then. There's a few more projects to finish off, so we'll be back.

Sunday, September 18, 2011

Holiday fun

Well the sander I was using for the restoration project burned out, so it was time for a new one. The last one was a fairly good brand and lasted for 12 years. Today George bought me a new one, not as good as the last and but it will do the job. The size sanding paper has also changed, this one is a little narrower. Now I can get on with the job again.

While I was at the hardware store, I bought some wood glue and two pine wooden picture frames, just a small project for them to work on tomorrow, then we can slap a coat of paint over them, add one of their holiday pics, and it' ready to take back on the plane with them. We always try do some sort of craft project when they here.I am thinking some of that drift wood,beads and shells, that still need to be used up.

We will return shortly and show you our projects
See ya
Rina and the boys

Sunday, September 11, 2011

A Restoration Job ...


A restoration job long over due, last time I worked on this piece was probably 6 years ago. A very long time to have it first standing in the garage and then under the carport. Today I thought it being such a nice day, sun's shining and I am in a very crafty mood, let's give it another go. It's the finer bits of paint stuck in all the grooves, sides and shelves.

There are suppose to be two doors and a shelf in the top section, and with fly screen
sides. Like the old meat safes. remember them?


The doors all need some magic yellow glue and new hinges and screws. I am thinking new coloured glass knobs as well maybe just clear white knobs will show off better against the periwinkle blue milk paint.

What 's the story behind this old beauty, Okay not all of you might think she beautiful ATM but wait till I do my magic on her. I used to work in a service station long time ago. Just about every Monday afternoons I spent at an auction house bidding against the dealers and wheeler of the antique trade. It used to be a standing joke with the auctioneer Gavin "Is that going on a bowser" I would just give him a nice grin. Then one day I saw this old yellow Kauri dresser, mentioned to George that would do up real nice, hope it's not to expensive. Meaning nothing over $150. For some reason I could not go to the Auction but George did. And he came home with it, I nearly passed out when I heard what the final bid for it was. $450 Needless to say I was stunned!!! Had the man lost all his marbles in that condition? There is no way in hell that I could ever recover the cost of it and make a profit. So now it's time to work on her again, she's going shabby chic. And then to the farm.

still a work in progress
Rina

Saturday, September 10, 2011

Visit to Costco ...


Check out this gorgeous plant stand, just right for the the back deck! Only it came in a black finish. Not to worry nothing a can of spray paint can't fix so I got some Rust Guard Epoxy Paint in a flat white and sprayed it One can was not quite enough, someone's off to Bunnings again.


Ta Da looking heaps better. Next time you see it it will be at the farm with the last coat of paint on it lol

See ya
Rina

Friday, September 9, 2011

Pink table setting ...


Pink Coasters, oh so pretty, I am very pleased with all ten of them. Only need to tuck away the threads and it's all done

Now for the centre table runner and napkin rings. Depending on how much yarn it's going to take I might make place mats but would rather have a runner for hot dishes. And then crochet some serviette rings with flowers on like the ones below.
Better not tell Dear Husband what I paid for that yarn. Not even sure I bought enough yarn to finish the project.


I bought 3 white dinner services with only 4 of each in a box. They're just for daily use so not very expensive. What I like about them is the plates are square, for me that is very modern.

Lincraft is not my favorite shop but they do have nice knitting yarn at a reasonable price, today they had 30% off, my lucky day. I tend to stay away from the smaller hobby craft/wool shops, which normally only carry expensive wool. They do however have a huge variety of beautiful quilting material.

I did manage to buy a few balls of 8 ply pink, soft green and lilac yarn for a crochet baby cot blanket for the old antique iron cot, already at the farm. Next time we are up there, I will set the cot up and take a pic of it to share. Need to get sizes for the blanket in any case. No babies expected ATM, maybe oneday I would get a lovely grandbaby again.

Thanks for popping in
Rina

Monday, September 5, 2011

a spring of pearls, some beads, lace and sea sand and driftwood....


It sad to think that I needed to go buy a few bits of junk jewelery from the opshop/GW just to be able to work on the next project. Tanya had thrown out her junk, she's good at getting rid of stuff as where I am not, a big hoarder, I will find a use for it sometime somewhere. I don't have any except the gold I wear daily. Last year my friend Pina and myself went to Tasmania for a week, we had a great time, came back with a big bag full of chocolate from the Cadbury's factory and a few other things, including driftwood and shells. Finally I have decided to make something with all that stuff.


Drilled holes through the shells and driftwood, broke up the bits of jewelry and beads, fake pearls. What goes nicer together than a spring of pearls, lace and sea sand and driftwood. Maybe use an old picture frame and some old photo's. Let's see what I can come up with.


Here's the first project, something to hang on a wall for a beachy theme, I am happy with the outcome, not to over the top. Would have to do with this pic atm taken inside cause it's such an over cast day here in Sydney.

Wednesday, August 31, 2011

What am I working on ATM ...


Plenty UFOs here, dig in a basket or plastic tube and your bound to find a few. Some never got finished cause I ran out of a certain colour of wool, some waiting for a few more designs of snowmen to complete the red work/stitchery blocks and some just to find a matching material to finish the quilting. Heaps of material but not the right one. I really do have to spend more time finishing them off.
The granny blanket is on the go ATM, ran out of the blue and can't find any anywhere. Then got some red and white wool to crochet with and with a little luck I might be able to finish this project. This will go on the back of a 3 seater cane lounge on the veranda on the front deck.


Just tucked the last few threads away of a little pink jug cover/doily with rose beads. The bead are there just to weigh the doily down at little. It's pretty maybe a little old fashioned but who cares. It will stop bugs falling into a jug full of ice cold cool drink waiting to be poured.


While waiting for George at the eye clinic on friday, paging threw a magazine I found a picture of some coasters, that were just screaming at me to crochet one up quickly. We sat there for atleast 2 hrs so I always take something to do with me. Lucky I had some of the same pink yarn and a 3.5 gauge hook in the bag and got 1 coaster made before George was finished. Now I will have to make 9 more cause the dinning table has 10 chairs. If I ever wanted to set the table up maybe I will need to do 10 place mats as well on a white table cloth. (Pic is not the best but it should give you an idea what I am up to.)

And then it's onto the dining room chair cushions, only I have temporary lost the use of my sewing machine, while Tanya's machine has gone in for a service.

Thanks for popping in
see ya soon
Rina

Sunday, August 28, 2011

The Deck out the back ...


A little sanding after screwing all the decking boards down.


After the first coat of decking oil, needs another coat, the woods so thirty soaking up that oil.


A collection of water cans. The decorating will probably change after the roof goes up, and a small table and chairs find their spot.


I would love an old potting table with a shelf at the bottom, some weathered terracotta pots covered in green algae. A few old tools and place for the old watering cans. Maybe even an old birds nest tucked in a corner.
Thanks for visiting
Rina

Friday, August 26, 2011

The Queen of the Tea Cosies ...


Now here is one fancy blog you just have to go visit


Never seen so many tea cosies in my life and most definately one of a kind. And she even has a book for sale. "I want one" I want to make one of these crazy looking cosies


or maybe one of these


Maybe this one


This is my pick for sure, not to over the top lol
Now just need to order this book, get the wool and I am set
See ya and have a lovely weekend
Rina

Thursday, August 25, 2011

Jar of hearts ... paper mache hearts


Do you shred documents and junk mail? If so, that little bin under the shredder fills up pretty quickly. You can put the shreds in with the recycled trash, compost it or make new paper. I decided to make some new paper from paper mache pulp and use it to make tags.


To make paper from paper shreds you’ll need:
Paper shreds or torn up paper
Water
Flour
Sugar
A large pot
A rolling pin
A strainer
Parchment or wax paper

Place your paper shreds in a pot of boiling water and let boil for an hour or so.
Stir the paper every now and then and add more water if needed. Time saving option: soak your paper overnight in a bucket of water to eliminate the boiling step.
Once the paper starts to get mushy; drain it in a large strainer. I used a wire strainer so the bits of paper wouldn’t fall through larger holes of a sieve.
While the paper is cooling, make paper mache paste. Here’s the recipe:
Combine ½ cup flour and 2 cups cold water in a bowl.
Boil 2 cups of water in a sauce pan and add the flour and cold water mixture.
Bring to a boil again.

Remove from heat and add 3 tablespoons of sugar.
Let cool. The paste will thicken as it cools
Squeeze your paper to remove as much water as possible. Slowly add the paper mache paste. You probably won’t need all the paste. Just enough to coat the paper.
At this point, I added little cut up bits of colored tissue paper to jazz up my paper. Don’t boil the tissue paper with the shreds or it will just become part of the mush.
Roll out your pulp between two pieces of parchment paper using a rolling pin.
Try to get your paper fairly thin.
Place on a cookie sheet or tray and let dry.


Once your paper is dry, cut them into desired shapes.


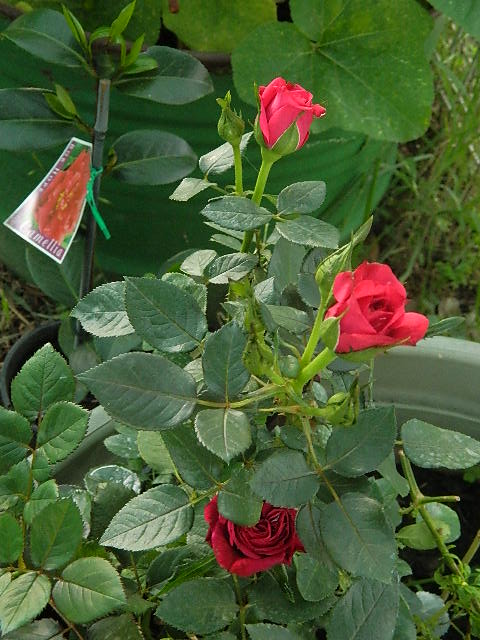
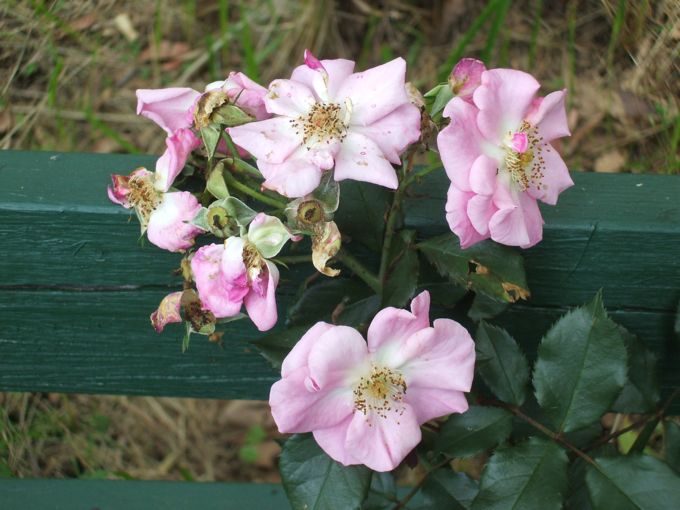
Mine cooked heaps longer cause I had a heck of a lot of paper, to which I add a lot of pink food colouring. Then after draining most of the water, added the flour glue mix, then added dried crushed roses and leaves, Working it through. Rolled out the ball of pulp thinly (mine could have been thinner), cut heart shaped cookies with a cookie cutter. Let it dry for a few days on a flat surface, break each heart off and cut edges neatly, sand the edges if they a little rough. I took all the hearts to work and sanded them with the linisher and drilled holes for the tries. A hole punch would not go through cause they were a little thick. Painted the edges with a little gold from Jo Sonya paints. Added the raffia for ties and it's all done
Rustic gift labels for the next few years. lol

That was fun making
See ya
Rina


Wednesday, August 24, 2011


Confession time I am a curbaholic, recycling and re purposing items give me a sense of satisfaction. Making something useful out of trash, take for instants this water bowl in my header. Started it's life as a concrete bird bath, with a little broken pottery, tile adhesive and a sealer and I put together this beautiful water bowl. I love Winter time when the camellias come into blossom, floating Camellia flowers brings a little charm into the garden.


What I am always on the look out for is plants and cuttings. With green fingers and lots of care these plants thrive, and soon get planted in the garden, costing me basically only my time. Nurseries are my No1 favorite shop, followed closely by craft shops.My favorite plants are agapanthus, pansy, lavender, camellias, clivia and roses. Once I found a whole boot full of agapanthus, just freshly dugout and dumped on the curb. No need to invite me twice, grabbed the lot. They're all planted in my garden now.


I hope to have a hedge of these lovely fragrant roses, haven't got a better picture of it yet


We do have a little creek running through our property with pretty water lillies growing in it.

Thanks for visiting
Rina

Monday, August 22, 2011

Welcome ... so glad to see you,

Welcome to my new blog.
So where do I start? What can I tell you about my daily life, love for craft and decorating and collecting of old wares,that you don't already know. With this blog I hope to bring you into my home, and share with you my treasures. Our journey to living in the shack or better known as Rose Cottage. Originally it was to be just a weekender for friends visiting but then they decided to move 2000klm away. Now we are renovating it to live in ourselves.Plans to build a more permanent home are shelved ATM.

Hopefully Rose Cotage will be liveable in the next 8 months, meaning we could actually have a working bathroom and a complete kitchen by then. In the meantime I am busy getting comfy cushions recovered, decorating as we go along. The garden is also happening at the same time. So I invited you to follow our progress and hope to see you next time
Rina